To make my job easier I'm still improving BTSDecompress. Here's an overview of the latest updates:
- Addition of Tab Pages to be able to open more than 1 query
- Addition of a Button bar to have easy access to some of the most used functions
- Addition of a dialog screen for maintenance of namespaces
- Addition of a beter query editor
- Addition of a Grid View for presenting the output
- Addition of a command-line version
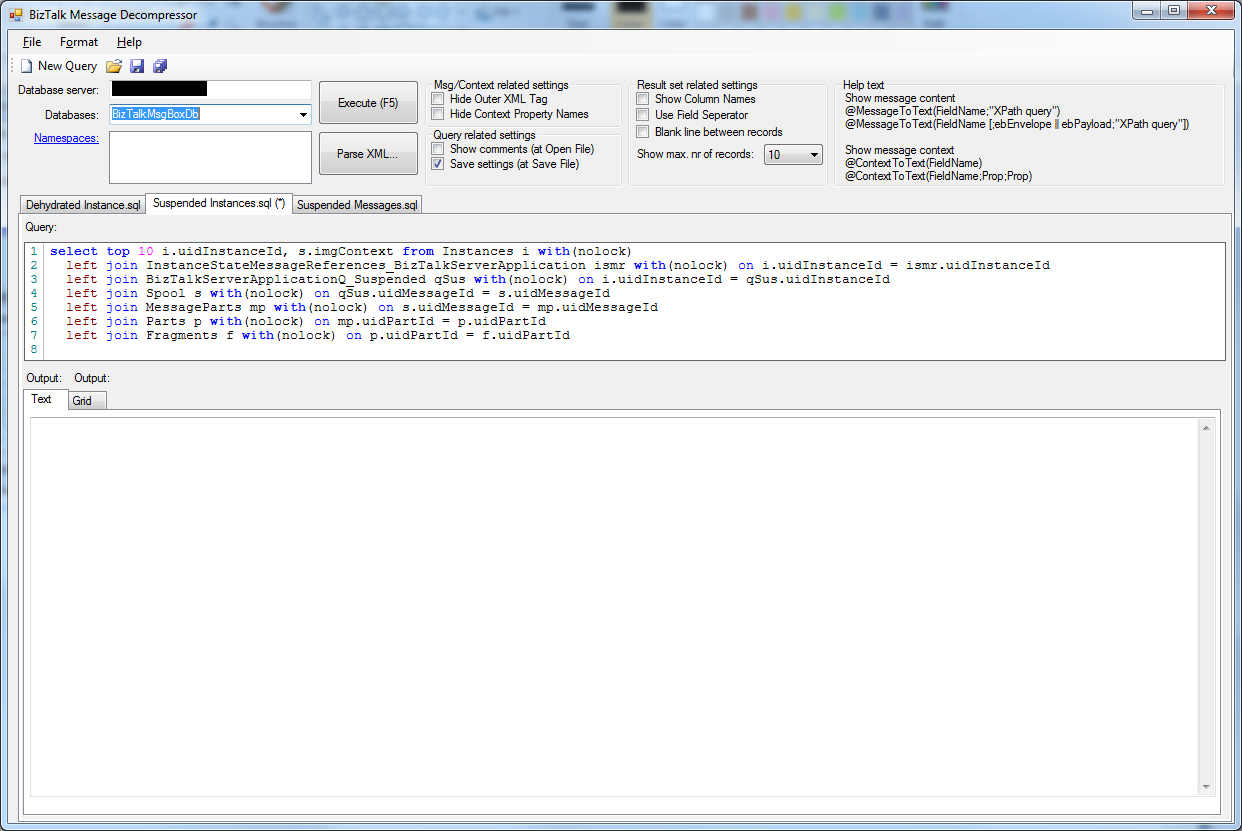
These updates are described in more detail below the following screen print.
Addition of Tab Pages
This enables you to be able to open more than one query at the same time. Most of the times I use BTSDecompress, I need 2 different queries. So I needed to open 2 instances of BTSDecompress. With the addition of Tab Pages, it's enough to start BTSDecompress just once and open all the queries I need.
Globally it works as follows:
BTSDecompress always starts up with one Tab Page and an empty query window
when you create a new query or open an existing one, it always shows up in a new Tab Page
the Tab of the Tab Page contains the file name of the query you opened. If you made changes to the query an asterisk is added to the Tab Page (see screen print)
you can close the currently selected Tab Page by pressing Ctrl-F4 or by clicking the right mouse button of the Tab Page and choose 'Close Tab'. In case the query has changed and might need to be saved, you are notified.
when you have opened multiple queries and you switch between Tab Pages (with Ctrl-Tab or mouse click), the settings which appear above the Tab Pages (Database Server, Database etc.) are also switched, making sure they reflect the settings of the currently active Tab Page/query
Addition of a Button Bar
For easy access to some of the most used functions a Button Bar is added. Currently it contains the following buttons:
New Query - open a new Tab Page with an new query
Open Query - open an existing query in a new Tab Page
Save Query - save the query in the active Tab Page
Save All - save all opened queries
It is likely that more buttons will become added in future releases.
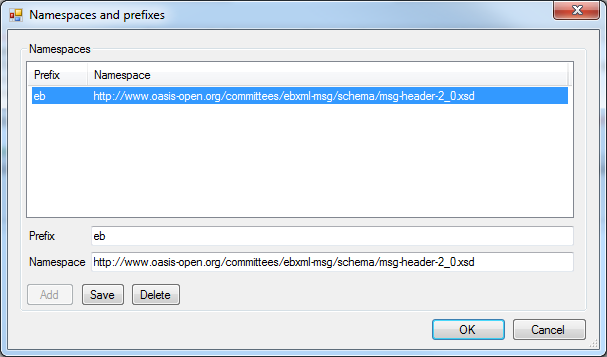
Addition of a dialog screen for maintenance of namespaces
After you have executed a query, the results will show up in the output frame. In most cases the output consists of XML messages. One of the nice capabilities of BTSDecompress, is that it is possible to add XPath queries, enabling you to view exactly that part of the message that you are interested in.
In many cases you might need namespaces to get to the part of your interest. In earlier releases of BTSDecompress, it was possible to add only 1 namespace. Since your message might contain more namespaces, it is now possible to add multiple namespaces. Maintenance (adding, editing, deleting) of these namespaces can be done with the new 'Namespaces and prefixes' dialog screen.
Of course the namespaces you entered are stored along with the query. This screen can be accessed by clicking the Namespaces hyperlink in the upper left corner of BTSDecompress.
Addition of a beter query editor
The query editor in the previous releases of BTSDecompress was nothing more than a multi line Text Box and did not have many features. I have to admit that I often created my queries in SQL Server Management Studio and copied them to BTSDecompress. So it was about time that BTSDecompress would get a richer query editor. I decided to use Pavel Torgashov's
FastColoredTextBox, which is a nice and very rich Text Box!
Although currently I'm not using all of the capabilities of this Text Box, using this Text Box already makes using BTSDecompress much more attractive. This editor supports amongst others color recognition for T-SQL statements and line numbers.
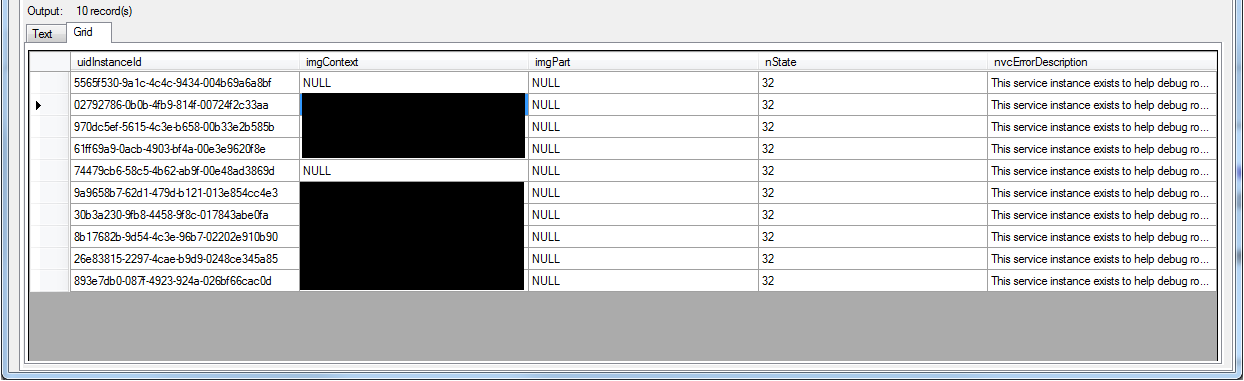
Addition of a Grid View for presenting the output
As of this release BTSDecompress not only shows the results in a Text View, but also in a nice Grid View for better readability. In contrast with SQL Server Management Studio, both Views are filled directly after executing your query.
Addition of a command-line version
This enables you to create batch jobs and have the output stored in a Text file. You can use the same queries as the ones you use for the GUI version of BTSDecompress. The command-line version of BTSDecompress is called
BTSDecompress_cmd.exe and has the following parameters:
- -s: Database server
- -d: Database
- -SQLFile: Query which will be executed
- -OutputFile: Location and name of the output file
- -OverwriteOutputFile: Overwrite the output file if it already exists
- -Namespace: Add (prefix and) namespace
- -HideOuterXMLTag: Show just the content of a XML tag, without the tag itself
- -HideContextPropertyNames: Hide the Context Property Names in the result
- -ShowColumnNames: Show the field names in the result
- -UseFieldSeperator: Show a Field Seperator (';') between the fields (and values) in the output
- -BlankLineBetweenRecords: Add an extra blank line between the records in the output, for better readability
- -?: Show Parameter Help
A couple of parameters can also be set in the query file, from the GUI version of BTSDecompress. By adding them as a parameter to
BTSDecompress_cmd.exe, the value which is set in the query file will be overruled.
More information
Where to find
BTSDecompress is Open Source software and can be found here:
btsdecompress.codeplex.com.
Hopefully this tool is helpful to others as well.